Subscribe:

Sunday 16 March 2014

How To Use MTN Unlimited Blackberry Subscription on any Device

Here is how to browse cheaply with your MTN blackberry subscription on any mobile phone and PC

Without wasting much of your precious time, here comes the deals:

 Subscribe to mtn blackberry of either daily=(Text BBDAY to 21600, price:#120 ) / weekly=( Text BBWEEK to 21600, price=#599 ) / monthly= (Text BIS to 21600, price:#1500 ).
the choice is your & also depends on your pocket. 
Then after the migration of any package of your choice, use the usual apn: blackberry.net, then for the Pc or Android users, use this:163.139.21.197 (primary DNS) & 133.143.228.6 ( secondary DNS ) to increase/enhance the surfing speed preferable on 3G network.
 Browse & download unlimited untill your validity period exhausted.


How To USE Your MTN BIS To BROWSE On Your COMPUTER And PHONE | With no software


Stop using VPN or anysoftware for MTN browsing on PC/laptop, Mtn Bis is rocking really good and fast right now on PC. Follow the Steps below:-
HOW TO ROCK MTN BIS ON YOUR PC/LAPTOP
1. Subscribe to any of the MTN BIS Plan below:-
To Subscribe for monthly MTN BIS, Text BBC to 21600 for a Month Plan | Cost N1,500.
To Subscribe for weekly MTN BIS Send BBCWEEK to 21600 for a week Plan | CostN400
2. Now Configure your Modem with thisSettings after your MTN BIS Subscription.
From your Modem Software Interface, Click on  "Tools"  then  "Options"  under which you will now select  "Profile Management" .
=> Under Profile Management, click on  "New"  and fill it as seen below:
Profile Name : MTN BIS
Apn:- blackberry. net 
Access number: *99#
IP: Leave it Empty
PORT: Leave it Empty
Username/Password: web 
=> Once you¡¯re done creating the profile, click  "Save"  to save the settings.
=> Go back to the Connection interface, select  "MTN BIS" , from the drop down box, then click " connect ".

If You Want To Drop A Comment Just Click Reply Below.

Latest MTN Browsing Cheat How To Browse On Laptops With MTN Blackberry plans

MTN  network is somehow bad this days due to the fact that we are in the rainy season. but irrespective of that, we must surf the net & make our selves happy.
 Without wasting much of your precious time, here comes the deals:

 Subscribe to mtn blackberry of either daily=(Text BBDAY to 21600, price:#120 ) / weekly=( Text BBWEEK to 21600, price=#599 ) / monthly= (Text BIS to 21600, price:#1500 ).

The choice is your & also depends on your pocket.  Then after the migration of any package of your choice, use the usual apn: blackberry.net, then for the Pc or Android users, use this:163.139.21.197 (primary DNS) & 133.143.228.6 ( secondary DNS ) to increase/enhance the surfing speed preferable on 3G network.

Browse & download unlimited untill your validity period exhausted.

Steps to browse free on pc using cracked modem on etisalat

Step 1: Create a New profile on your modem with the
following settings:
Access Point: blackberry.net
Then Go to advance and set your dns with the follows: Primary DNS address: 8.8.8.8
secondary DNS address: 8.8.4.4
now connect and configure all your PC programs with the
following proxy and
port address:Proxy address: 10.71.170.5
port: 8080

Latest Airtel Browsing Cheat How To Browse On PC With Airtel Blackberry plans

We got so many people using BB nowadays than ever before which some of them have their own pc and wondering how they can use this huge unlimited to browse on their system and phone.

But today the am posting how to use your airtel BIS to browse on your computer and Phone with no issues. Follow the below steps:-

How can i get Airtel unlimited BIS plan

*LOAD UR PHONE WITH JUST 100 Naira

*Dial *440*18# to get Airtel unlimited BIS plan for just a day,

*Immediately you will receive a message telling you that  the airtel unlimited plan is active  Immediately send stopautorenew to 440 for it not to renew again

*Now remove your sim card and insert it to your modem.

>> Create a new connection profile on your modem with the below details.
Connection Name: Airtel BIS
APN : internet.ng.airtel. com or internet.ng.zain.co m
Username: internet
Password: internet

>> Then select the “AIRTEL BIS” connection profile you created earlier and click on connect. Thats all, I Really hope this wil help you Guyz IF YOU HAVE ANY QUESTION TO ASK ME PLS DO.

MTN Blackberry BB Unlimited Free Browsing Cheat Tweak With HAVILAH VPN

STEP 1: subscribe to mtn blackberry plan either weekly or monthly
             Text BBCWEEK to 21600 for 1 week subscription costs N500

             Text  BBC to 21600 for 1 month subscription costs N1500

STEP 2 : configure your modem apn to blackberry.net

STEP 3 : Download havilah vpn here http://allsoftware.com.ng/dl/havilahvpn4.1.exe

STEP 4 : install the software and Run As administrator

STEP 5 : insert your username and password , under server & protocol choose UDP and then in the front of the UDP select any server you like

STEP 6 : under OPTION MENU  , click SERVER PORT , under remote port choose other and insert 500 and under Local port choose other and insert 1110

FINALLY CLICK CONNECT AND YOU ARE CONNECTED ONE ?HAND

DOWNLOAD  IS UNLIMITED  SO DOWNLOAD TILL YOUR PC BATTERY RUN DOWN

You can reply below for help:.

Etisalat downloading with speed for pc USERS WITH JWP

JWP PC ANOTHER NEW VERSION 3.1 HAS JUST BEING RELEASED TODAY BY JOE TO DOWNLOAD THE LATEST VERION OF JWP VISIT www .joshsoft. com TO DOWNLOAD THE LATEST VERSION OF IT.
TO SETUP UR JWP JUST INSERT UR USERNAME ND PASSWORD
CONFIGURE UR MODEM WITH THE FOLLOWING
APN:-etisalat
username nd password:-web
set ur browser like dis
ip:127.0.0.1
port:8080
connect and enjoy.

How To Browse Free On MTN Using ICTvpn

Vpn is still rocking the browsing network, but the latest software for browsers is called ICTvpn which is tunneling software. It is just like a subdomain but it is not just like a sub brower cos it is fast.
vpn

How To Get Started.
Before you get started, this device is only done on PC and not all phone and also you don't need a bis subscription for it to work i.e you can do it with just N0.00 on your MTN sim card.

* First step you ought to take is to Download the ICTvpn by Clicking Here and also if you did wish to register with them, then Click here, but the registering aspect is a little bit compulsory.

* After the running an installing it on your PC the ensure you did configure it on your modem with the configurations below:
i. Profile Name => ICT VPN
ii. Access Point i.e APN => web.gprs.mtnnigeria .net
iii. Access Number => *99#
iv. Username => web
v. Password => web

* Then after configuring it tap Save and connect it. Thats all And note that the demo account usually last for 48hrs, login details are:
i. Username=> demoaccount
ii. Password=> demoaccount Well, you must upgrade the device and it costs N500 but incase you feel like doing it then you must contact the owner of the ICTvpn software to activate the demo account for you if it’s not active.

To contact him then goto his website at ICTvpn tunneling software.

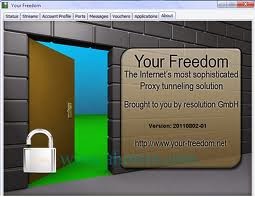
Free Browsing On ETISALAT Using Your Freedom

The former tunneling works i.e ICTvpn works only one PC but this one is the latest which works for both PC and Android phones.

freedom

Below are the steps to get started with the Etisalat browsing with the Your-freedom.
* First step to take is to have an account with them via http://www.your-freedom.de/
* Now you are to download the latest version of Your-freedom here.
* You must run and Install as an administrator.
* After the installing, goto configure + server connection = ems18.your-freedom.de
* Input yor port as 53.
* Connection mode=DNS. Tweak Nigeria Etisalat.
* Then mark 3,5,7,9. Then minimum buffer size=1500.
* Reconnection delay=5000, initial post size=10000000, minimum= 20000, ftp mode= both, ssl protocol= Any.
* Input your username and password you used in registering in the account information area save and exit.
* Then goto the Ports and untick Web Port= 6050 or 6052 and tick back.
* Configure your browser like this Proxy: 127.0.0.1 and Port 6050 or 6052 depending on the one you used on YF
* APN: etisalat
* Save and tap the connection pad.

Note it is the same with the setting of Android phones by just downloading the Your Freedom.

Please share this information with our friends on twitter and Facebook by using the share button.

How To Easily Scan Your MyTV Reciever For More Channels

Plus Why The Scan Is Neccessary

Why Is It Neccessary To Scan Your MyTV Reciever: its is highly recommended that you scan your MyTV reciever , to keep your channel list- up to date with the latest ones.
It is also suggested that you scan your MyTV reciever monthly.

HOW TO SCAN YOUR MyTV RECIEVER IN 9 EASY STEPS:

1. Select a MyTV channel (MyTV Africa,MyTV Series etc.)

2. Press the "MENU" button on your remote control.

3. Go to "INSTALLATION" and select it.

4. Enter your PIN; if you have not changed the pin before, the default pin is "0000" (without the quotes)

5. Scroll down and select "MANUAL SCAN"

Tips on how to browse free or very low onall networks and for all device.

1. Airtel. (Much spending)
The best data plan one is adviced to use on
the airtel network is there BB monthly
access.
This plan surfs net on any device which
includes your java, symbian, android,
iphones, Pc e.t.c..
To get started, simply dial *440*16# and #
1500 would be reducted.
Note:- You would recieve a text telling you
that you are live on airtel BB unlimited plan.
Its limited oo, You would be given just 2GB
for one month.

2. Globalcom. (Less spending)
Glo network is another network that you
can use to surf net at lower price on all
device.
Did you know that recentlyGlo reduced
there BB plan package to #1000.
With this package you can surf a limited
access of 3GB data plan for one month.
Those this package works on all device?
Yeah. It works perfectly on all device.
Simply change theAPN of your device to
blackberry.net and save.
To get started simply send BBCMonth to
777.
To check balance simply dial *777*0#
3. Etisalat (Very low or No spending) Most of you would be looking
into that no spending issue. Don't worry
we are working on all lines to make sure
we get you the latest freebrowsing feeds.
Well etisalat is favourable to android and Pc
users for now.
Java and symbian users check bak lata.

Lastly Mtn. (Very Low spending)
Well java and symbian users, none for now,
but i advice you to migrate to Mtn pulse by
dialing *406#. No charged access for
migration.
After migration Load #100 and you would
be given 15MB solid data plan without any
expiring date.
Dial *559# to check balance.
Do you know that this Mtn 15MB data
bundle lasts like a 60MB data bundle?
Symbian users should know what i mean.

Your PC Must Browse For Free With This Tweak

YOU MUST BROWSE  FREE  WITH THIS:

AFTER DROPPING A TRICK/TWEAK FOR ANDROID PHONE, I GOT MSGS FROM MY FANS REQUESTING FOR PC BROWSING TWEAK/TRICK WHICH I PROMISED TO DO SO. SO HERE I AM.

FOR THOSE WHO HAS ALREADY DOWNLOADED THE FREEDOM SERVER SOFTWARE I POSTED HERE  SHOULD FOLLOW THE STEP BY STEP BELOW TO START BROWSING FOR FREE OR AT A LOW PRICE:
FIRST GOTO www.your-freedom.net to signup
GLO USERS:
GOTO  YOUR FREEDOM SOFTWARE YOU DOWNLOADED.
I.   CLICK ON CONFIG ON THE FREEDOM INTERFACE.
A NEW DIALOG BOX WILL POP-UP
ii. AT SERVER CONNECTION. TYPE IN THE FOLLOWING:
a.   ADDRESS: australiaproxy.biz
b.   PORT: 80
c.   CONNECTION MODE: http
OPTIONS:
Thick on everything you sees except AVOID USING DNS, pls don’t thick on it.
MIMIMUM BUFFER SIZE:1900
Leave everything except FTP MODE: both
ii. AT PROXY SETTINGS:
PROXY ADDRESS: australiaproxy.biz
PROXY PORT: 80
USERNAME: insert your username used in signup at www.your-freedom.net
PASSWORD: insert the password used in signup
PROXY DOMAIN: hidemyass.com
PROXY TYPE: http/https
PROXY AUTHENTICATION: any or none
USER AGEBT: www.your-freedom.net

FTP PROXY SERVER
PROXY ADDRESS: australiaproxy.biz
PROXY PORT: 80
 NOW CLICK ON ‘’SAVE AND EXIT

NOW IT WILL TAKE YOU BACK TO THE FREEDOM INTERFACE.
NOW LOCATE ‘’APPLICATION’’ AT YOUR RIGHT HAND SIDE,
THICK ON EVERY THING THERE SUCH AS: ms internet explorer, yahoo messenger, mozilla firefox etc and then click  OK, if there is any other thing  you sees or comes up then choose ok.
NOW CLICK BACK ON STATUS AND CLICK ON ‘’START CONNECTION.

NOW CONNECT IT WITH YOUR GLO SIM VIA MODERM, PLS MAKE SURE THAT YOUR MODERM IS BEING CRACKED AND ALSO IS NOT A GLO MODERM, USE ANY OTHER MODERM APART FROM GLO.

CONNECT IT  WITHOUT MB OR MONEY.
BROWSE,DOWNLOAD AND WATCH FILMS VIA NET FOR FREE.

I WILL SOON POST THE ONE FOR AIRTEL AND MTN, ALL ARE THESAME EXCEPT THE IP.
ANY OTHER ENGUIRING PLS DROP IT HERE.

THIS IS MY GIFT TO ALL MY NAIJA FANS.

HAPPY SURFFING

Latest MTN BIS Now Working On Pc/Laptop Again – No VPN/Software Needed

MTN BIS now Surfing Faster and even more Reliable on PC/Laptop without any VPN or Software.


Stop using VPN or any software for MTN browsing on PC/laptop, Mtn Bis is rocking really good and fast right now on PC. Follow the Steps below:-

HOW TO ROCK MTN BIS ON YOUR PC/LAPTOP
1. Subscribe to any of the MTN BIS Plan below:-

To Subscribe for monthly MTN BIS, Text BBC to 21600 for a Month Plan | Cost N1,500.
To Subscribe for weekly MTN BIS Send BBCWEEK to 21600 for a week Plan | Cost N400

2. Now Configure your Modem with this Settings after your MTN BIS Subscription.

From your Modem Software Interface, Click on “Tools” then “Options” under which you will now select “Profile Management”.

=> Under Profile Management, click on “New” and fill it as seen below:

Profile Name : MTN BIS
Apn:- blackberry. net
Access number: *99#
IP: Leave it Empty
PORT: Leave it Empty
Username/Password: web

=> Once you’re done creating the profile, click “Save” to save the settings.

=> Go back to the Connection interface, select “MTN BIS”, from the drop down box, then click “connect“.

Enjoy!!!!

Like, Share & Tweet this Post if you Appreciate it.

CProxy Portable

CProxy Portable
 Unlimited browsing & downloading ba to TS?
    ~Oo naman, magsawa ka ng magdownload
    Pwede ko ba gamitin ung ibang server TS?
    ~Oo naman kung anong gusto sa tatlong servers
    Pwede ba akong makapagdownload gamit ang IDM TS?
    ~Oo, basta lagyan mo ito proxy sa IDM.
    -Click Downloads then click Options then click Proxy/Socks
    -Check Use Proxy then input PSA: 127.0.0.1 then Port: 3128
    -Then check HTTP, HTTPS & FTP then click OK
    Paano kung may existing cproxy ako sa PC na hindi portable, kelangan ko pa ba i-uninstall un TS?
    ~Hindi na, wala namang conflict un.
    May limit po ba ito TS?
    ~Wala, 1GB+ pa nga ung na dl ko eh
    Ano nga ba pinagkaiba nito sa trial account TS?
    ~Ung trial account talagang mabilis sa browsing at downloding ung nga lang may limit
    -Browsing up to 30MB-40MB Only
    -Downloading up to 100 MB Only
    ~Eto naman may browsing speed limit na 128kbps / 64kbps / 32kbps, pero unlimited naman sa upload & download.
    Gumagana ba ito kay Globobo TS?
    ~Hindi, kasi matagal na etong kinatay ni Globobo.
    Bakit kapag nag 1 hour gamit ko eto nawawala ung connection at ung dl ko sa IDM 0 kbps TS?
    ~Kasi ganyan talaga kapag Smart Sim gamit mo, yan talaga issue dyan 1 hour dc, wait 2-3 minutes at makakabrowse kana at magtuloy ulit ung dl sa IDM.
    Bakit minsan nalabas sa browser ko "You are using DEMO version, please Sign up.." TS ay ganito TS?
    ~Kasi "Demo Account/ Cproxy Demo / Cproxy Standard" gamit natin hindi ung trial account, wait nyo lang ng 10 seconds at mag redirect din yan sa ni-access mong webpage.
    Bakit ung kay alaa92 may account TS?
    ~Tama may account nga ung gamit nya, un nga lang parehas din ito pati expiration ang pinagkaiba lang eh ung sa subscription
    -Cproxy Standard kapag nilipat ung bilog sa UserID: Pass: then apply.
    -Cproxy Demo kapag nasa demo account then apply.
    Ano nga ba ang User ID at Pass ng Cproxy Standard TS?
    ~Eto User ID: 100000001 Pass: demo
    Bakit minsan "Demo is not available now" TS?
    ~Ibig sabihin marami ng demo user sa server na ginagamit kaya palit kana lang ng ibang server then apply


Download
sharemobile.ro/file/739615

How To CONFIGURE All Computer BROWSERS For Free Browsing


HOW TO CONFIGURE INTERNET EXPLORER:
This Few Steps will help
you to Effectively Configure your
Internet Explorer Perfectly i.e How
to Insert Ip & Port into Internet
Explorer
FOLLOW THE BELOW STEPS
1. Open the Internet Explorer
through the Icon on your System
desktop
2. When it Opens Click on TOOLS
>> INTERNET OPTION
3. Now Click on CONNECTION >>
SETTINGS
After Click on Settings, A Pop up
like This will Appear!
4. Tick the USE A PROXY SERVER
and Enter the IP & PORT given to
you.
ADDRESS means IP
PORT is PORT.
Then Save & Exit.

HOW TO CONFIGURE YOUR MOZILLA FIREFOX
This Few Step will help
you to Effectively Configure your
Mozilla Perfectly i.e How to Insert
Ip & Port into Mozilla!
FOLLOW THE BELOW STEPS
1. Open the Mozilla through the
Icon on your System desktop
2. When it Opens Click on TOOLS
>> OPTION
3. Then NETWORK >> SETTINGS
and the Below Image will be
Shown
4. You will be provided with 3
Option to Choose From. Choose
the Last One (MANUAL
CONFIGURATION)
Then Insert the Details given to
you by CODED HOUSE, Am talking
about the IP & PORT.
Enter the Following Info into the
Space Provided
HTTP PROXY means IP
PORT or PROXY PORT means PORT
Then Tick, Use Proxy Server for all
Protocol or Otherwise Stated!
Then SAVE & EXIT.

HOW TO CONFIGURE OPERAMINI ON COMPU
TER:
This Few Steps will help
you to Effectively Configure your
Opera Perfectly i.e How to Insert
Ip & Port into Opera!
FOLLOW THE BELOW STEPS
1. For New Opera, You will Click
the Menu at the Top of the Page!
MENU >> SETTINGS >>
PREFERENCE
But if its the Old Version or You
did not See the Menu at the Top
of your Own Opera, Then Click on:
TOOLS >> PREFERENCE
2. After Click on Preference, A Pop
Up will Come Out, Now Click on
ADVANCE
3. Locate & Click on NETWORK >>
PROXY SERVER, After clicking on it,
A Pop Up that contain the Space
for IP and Port will Appear.
Tick the Small Box & Put the IP
Address given to you into the
HTTP Box and the Port into the
PORT Box
NOTE: All Other Box Below are not
Neccessary, But you can Put them
for Putting Sake!
Then Save & Enjoy!

HOW TO CONFIGURE GOOGLE CHROME:
This Few Steps will help you to
Effectively Configure your Chrome
Perfectly i.e How to Insert Ip &
Port into Chrome
FOLLOW THE BELOW STEPS
1. Open the Chrome through the
Icon on your System desktop
2. Click on TOOLS >> OPTIONS,
Then a Tab of Many Options will
Pop Up.
3. Click on UNDER THE HOOD >>
Scroll Down to NETWORK >> and
click the CHANGE PROXY SETTINGS
4. Under the CONNECTIONS TAB
>> Click LAN SETTING and Select
USE PROXY SERVER
Then Enter the IP and PORT Given
to you into the HTTP PROXY &
PORT Box Available there.

How To Get Unlimited Gigabytes On Mtn For Free & Transfer Up To 7GB To Another User

With this new way of getting free Gigabytes, you can send up to 7GB to another Mtn Users, also with one Mtn Sim card you can transfer this Gigabytes to many Mtn line and the code is working fine with #0.00! balance.

It is time to enjoy what i have been enjoying for the past 7 days, i was not intended to drop this tweak this time around because it is what is really fetching lot of money into pocket of hackers now and nobody wish to reveal the secret for  free but i don't blame them because most of them spent a lot of money to get the tweak. Due to one of my recent post about How To Get 3GB On Mtn Sim For Free which many people complain that is no more working while am still flexing with it, any way, i decide to drop this one to replace it for you guys.


What Can I Do With The Mtn Free 7 Gigabytes?

[LIST=1]
  • Browse and Download unlimited.
  • It only last for one Month
  • You can browse with it on PC/Tablet, Android, Apple phones, Symbian and Java Phones  with simple configuration.
How Can I Learn How To Get The Gigabytes?

There are series code for generating this Gigabytes but i decide to share you the best one among which  is How You Can Transfer Up To 7GB To Another Mtn User at once for free.
Am sorry please, i don't intent to stress you but for security purpose, the code can't be drop here.

For the full detail on how to get it done; drop your email address through the comment form  below and the detail will be forward to you as soon as possible.

Understand that the comment box will be closed as soon as we detect  that the code is no more working, when you came late and you met comment box closed please don't drop your email in another thread as you did last term when i posted the Glo Chocolate Tweak. This is because i hate send you the outdated information.

You Might Also Like:

Don't thank me....
Just make sure you share or like and tell your friends and families to always visit this site...

blogger cool css tooltip trick

Hi there here is trick to add tool tip in your blogger for better interface and user views small trick which will earns you lot this trick will works for all most all website codes even though its might be wordpress or blogspot or blogger or website before going  see my previous trick on how to increase pageviews in blogger here so lets get into procedure

WHAT YOU NEED AND TUTORIAL BELOW:

DEMO below:
blogger tutorials,blogger tricks,css code tooltip,tooltip css code

STEPS TO GET THIS TRICK:
  • Go to the “Template” section in your Blogger dashboard.
  • Click on “Edit HTML” and then “Proceed”.
  • Using “Ctrl+F”, look for ]]></b:skin>
  • Copy the following code and then paste it right before it:
  • .toltip {
     position: relative;
     background: #eaeaea;
     cursor: help;
     display: inline-block;
     text-decoration: none;
     color: #222;
     outline: none;
    }

    .toltip span {
     visibility: hidden;
     position: absolute;
     bottom: 30px;
     left: 50%;
     z-index: 999;
     width: 230px;
     margin-left: -127px;
     padding: 10px;
     border: 2px solid #ccc;
     opacity: .9;
     background-color: #ddd;
     background-image: -webkit-linear-gradient(rgba(255,255,255,.5), rgba(255,255,255,0));
     background-image: -moz-linear-gradient(rgba(255,255,255,.5), rgba(255,255,255,0));
     background-image: -ms-linear-gradient(rgba(255,255,255,.5), rgba(255,255,255,0));
     background-image: -o-linear-gradient(rgba(255,255,255,.5), rgba(255,255,255,0));
     background-image: linear-gradient(rgba(255,255,255,.5), rgba(255,255,255,0));
     -moz-border-radius: 4px;
     border-radius: 4px;
     -moz-box-shadow: 0 1px 2px rgba(0,0,0,.4), 0 1px 0 rgba(255,255,255,.5) inset;
     -webkit-box-shadow: 0 1px 2px rgba(0,0,0,.4), 0 1px 0 rgba(255,255,255,.5) inset;
     box-shadow: 0 1px 2px rgba(0,0,0,.4), 0 1px 0 rgba(255,255,255,.5) inset;
     text-shadow: 0 1px 0 rgba(255,255,255,.4);
    }

    .toltip:hover {
     border: 0;
     /* IE6 fix */
    }

    .toltip:hover span {
     visibility: visible;
    }

    .toltip span:before,.tooltip span:after {
     content: "";
     position: absolute;
     z-index: 1000;
     bottom: -7px;
     left: 50%;
     margin-left: -8px;
     border-top: 8px solid #ddd;
     border-left: 8px solid transparent;
     border-right: 8px solid transparent;
     border-bottom: 0;
    }

    .toltip span:before {
     border-top-color: #ccc;
     bottom: -8px;
    }    
  • Now save your template and when ever you want this effect use class="toltip" in that tag and your message in <span>.....</span> tags 
  • Example to how you use
  • <a href="#"class="toltip">text here which should have tooltip<span>message in tooltip goes here</span></a>
  • hope you like this tutorial
have a nice day, feel free to have clarify your doubts

Make seo optimized template blogger with meta title tags

In this article i will like to share how to Make blogger template seo optimized using simple five steps, Make your template seo optimized using my tutorial so that you can gain good google page rank . you can also have a look on my previous articles on make custom error pages for your blogger loads faster and quick, Add bubble numbered count for the comments in blogspot, Keyboard button effect for all blogger and wordpress users . ok further tricks can be searched in my blog. lets get into seo optimization.

seo optimized,labels,archieves,comments,tittle,optimized,fast loading,template

I Divided the tutorial into five steps so that you can powered your blogger template with this powerful meta tags so that it can get into search engine fastly with in no time i mean less time. the steps which you can made seo optimization as as follows:

The seo optimized template techniques are as follows:

  1. SEO optimized meta tags and titles
  2. Seo optimized Archieves
  3. SEO optimized Labels
  4. seo optimized Comments
  5. seo optimized page loading 
Before going to edit template backup your template so that you can retrieve it back if you want so. to edit template simply login to your blogger > left side bar select Template > now Click on Edit Html .
Step 1 : SEO OPTIMIZED META TAGS AND TITLES:
 I have developed few codes which collected from internet and made few changes so that users can understand it properly so i made this in two parts 1)static metatags 2)dynamic metatags
  • Static Meta tags : These are few lines of code you have to add in your template before </head> tag you can find complete tutorial on how to make blog seo optimized here. ( i want to give tutorial on dynamic tags so please go to link if you want static tags).
  • Dynamic Meta Tags : This is best part to drive huge traffic to your blog and make your blog responsive too to do so follow my below steps
    1. Search for the tag below
    2. <title><data:blog.pageTitle/></title>
    3. Now replace the above tag with below code
    4. <!--[Meta Title ErrorPage/404]-->
      <b:if cond='data:blog.pageType == &quot;error_page&quot;'>
      <title>404: Sorry the page you are looking is not found | Your_BlogName</title>
      </b:if>
      <b:if cond='data:blog.pageType != &quot;item&quot;'>
      <!--[Meta Title Search Page]-->
      <b:if cond='data:blog.searchQuery'>
      <title>Keyword search for :: <data:blog.searchQuery/> :: | Your_BlogName</title>
      </b:if>
      <b:if cond='data:blog.pageType == &quot;archive&quot;'>
      <!--[Meta Title Archive Page]-->
      <title>Post Archive by Month <data:blog.pageName/> | Your_BlogName</title>
      <!--[Meta Description Archive Page]-->
      <meta expr:content='&quot;Post Archive by Month &quot; + data:blog.pageName + &quot; learn more please visit &quot; Your_BlogName &quot;' name='description'/>
      <b:else/>
      <b:if cond='data:blog.pageType == &quot;static_page&quot;'>
      <!--[Meta Title Pages]-->
      <title><data:blog.pageName/> | <data:blog.title/></title>
      <!--[Meta Description Pages]-->
      <meta expr:content='data:blog.pageName + &quot;. Please read the article &quot; + data:blog.pageName + &quot; learn more please visit Your_BlogName &quot;' name='description'/>
      <b:else/>
      <!--[Meta Title Label Page]-->
      <b:if cond='data:blog.searchLabel'>
      <title>Search for Label :: <data:blog.pageName/> :: Your_BlogName </title>
      <!--[Meta Description Label Page]-->
      <meta expr:content='&quot;Search for category ::&quot; + data:blog.pageName + &quot;:: learn more please visit Your_BlogName &quot;' name='description'/>
      <b:else/>
      <!--[Meta Title Homepage]-->
      <title><data:blog.pageTitle/></title>
      <!--[Meta Description Homepage]-->
      <meta expr:content='data:blog.pageTitle + &quot; Write your blog description here.&quot;' name='description'/>
      </b:if>
      </b:if>
      </b:if>
      <!--[Meta Keyword Homepage]-->
      <meta content='keyword11, keyword12, etc' name='keywords'/>
      <b:else/>
      <!-- Meta Title Post Page -->
      <title><data:blog.pageName/> - <data:blog.title/></title>
      <!--[Meta Description Active Post Page]-->
      <b:if cond='data:blog.metaDescription'>
      <meta expr:content='data:blog.metaDescription' itemprop='description'/>
      <b:else/>
      <!-- Show if the Meta Description post Page is not active-->
      <meta expr:content='data:blog.pageName + &quot;. Please read the article &quot; + data:blog.pageName + &quot; learn more please visit Your_BlogName &quot;' name='description'/>
      </b:if>
      <!--[Meta Keyword Post Page]-->
      <meta expr:content='data:blog.pageName + &quot;, keyword11, keyword12,etc&quot;' name='keywords'/>
      </b:if>
    5. No need to worry of editing any thing in above tag as its dynamic automatically fetches your blogger name,tittle,labels ..etc But replace keyword11, keyword12,etc with your keywords, and replace Write your blog description here. with your description, Your_BlogName with your blog name ( as keyword ,Blog name and description depends on blog i cant make it as dynamic so do your self).
Step 2: SEO OPTIMIZED ARCHEIVES :
As far the archieves should should also be seo optimized as our previous posts will be in archieved so to do so for better seo rank of your blog we need to optimize archieves also to do so follow below steps
  1. Find the below code in your template
  2. <a class='post-count-link' expr:href='data:i.url'>
  3. Now replace the above code with below
  4. <a rel="archives" class='post-count-link' expr:href='data:i.url'>
  5. Now your blog is having seo optimized archieves
Step 3 : SEO OPTIMIZED LABELS:
  We all know that labels play a key role in search engines which should perfectly match with the keywords so we need to optimize the labels for better seo see below steps to achieve this
  1. search for the below code in your template
  2. <a expr:href='data:label.url'
  3. Now remove code and paste below code in to your template
  4. <a expr:href='data:label.url' rel='tag'
  5. Now the labels are optimized
Step 4: SEO OPTIMIZED COMMENTS:
I can say that comments are best part for better traffic as its having text filled by users so that our blog content increase and we can have lots of tags from the users comments to make use of this we need to optimize this for better seo so do the changes as below
  1. Check for the below code in your blogger template
  2. expr:href='data:post.createLinkUrl'
  3. Now delete above code and add below code
  4. rel='external nofollow' expr:href='data:post.createLinkUrl'
  5. Now the comments are optimized for better seo
Step 5: SEO OPTIMIZED PAGE LOADING : (optional) (lazy load for blog)
Page loading plays a key role in seo as the page loads fast your page having more seo points so that it can get into search engine fastly as well users wont get irritate as our page loads fastly to optimize our web page loading we need to do have changes as mention right below:
  1. Just keep the code which located below with in <head> </head> tag still get confusion just add below code before </head> tag
  2. code located here
  3.      <script charset='utf-8' src='http://ajax.googleapis.com/ajax/libs/jquery/1.3.2/jquery.min.js' type='text/javascript'/>
        <script src='http://gugly4u.googlecode.com/files/lazyload-min.js' type='text/javascript'/>
        <script charset='utf-8' type='text/javascript'>
        $(function() {
        $(&quot;img&quot;).lazyload({placeholder : &quot;http://gugly4u.googlecode.com/files/dot.gif&quot;,threshold : 200});
        });
        </script>
  4. Now save your template
Note : On end of every step save your template
Now your blog template is seo optimized see my posts on how to  increase pageviews of your website here , hope you like our article .

Blogger official contact page and widget with floating icon

Blogger official contact page and widget with floating icon which is an custom contact page for all bloggers.This tutorial teach you how to add blogger contact form widget as well as blogger contact form page. This widget is officially provided by blogger itself. before getting this tutorial have a look on how to increase pageviews in your site for good google page rank here , How to add html codes in blogger who using old interface ,add page numbers in blogger simple tip and trick

blogger contact form page,blogger contact widget,blogger tricks,contact widget

What is official Blogger Contact widget or page :

Blogger contact widget is officially provided by blogger for all its users those who want to interact with the audience of his/her blog.this will forward the details enter by user to the email id provided by the user which is used for login more over it will forward that mail to all admin of that blog also.

Steps required to add contact widget :

  1. login to your blogger and select the blog which you want to add contact widget(if you have more than one blog)
  2.  On your left side panel click on Layout  (in image 1)
  3. Now click on Add a Gadget where you want to appear your contact widget.
  4. Now in Add a Gadget window click on More Gadgets . (in image 2)
  5. Click on contact Form and your widget is ready to use

 Steps to add contact page :

  1. To add contact page above steps are same after that continue with below steps
  2. In blogger left sidebar click on  Pages now click on New page select blank page (in image 3)
  3. Now type title contact page or your wish
  4. Now click on HTML tab and copy & paste below code into that page content (in image 4)
  5. <style>
    .contact-name, .contact-email {
    max-width: 200px;
    width: 100%;
    }
    .contact-message {
    max-width: 400px;
    width: 100%;
    height: 150px;
    }
    </style>
    <form name="contact-form">
    <p></p>
    Name
    <br>
    <input class="contact-name" id="ContactForm1_contact-form-name" name="name" size="30" value="" type="text">
    <p></p>
    Email
    <span style="font-weight: bolder;">*</span>
    <br>
    <input class="contact-email" id="ContactForm1_contact-form-email" name="email" size="30" value="" type="text">
    <p></p>
    Message
    <span style="font-weight: bolder;">*</span>
    <br>
    <textarea class="contact-message" cols="25" id="ContactForm1_contact-form-email-message" name="email-message" rows="5"></textarea>
    <p></p>
    <input class="contact-button-submit" id="ContactForm1_contact-form-submit" value="Send" type="button">
    <p></p>
    <div style="text-align: center; max-width: 222px; width: 100%">
    <p class="contact-form-error-message" id="ContactForm1_contact-form-error-message"></p>
    <p class="contact-form-success-message" id="ContactForm1_contact-form-success-message"></p>
    </div>
    </form>
  6. Now save the page .
  7. In blogger sidebar select Template and click on Edit Html. (in image 5)
  8. Now click on Jump to widget select contact Form1 from drop down list (in image 6)
  9. Click on small arrow beside the widget again click on small arrow (in image 7,8)
  10. Now select code in between <b:includable id='main'> ...... </b:includable> (in image 9)
  11. Delete the code which you highlighted from above step.
  12. Now save your template . go to page which you created and check that it will having working contact page now.

Steps to add floating contact icon:

  1. Click on Layout > Add a Gadget > HTML/JAVASCRIPT
  2. Now copy and paste below code into it
  3. <a href="Your_URL"><img src="https://blogger.googleusercontent.com/img/b/R29vZ2xl/AVvXsEgUeQO2HeuLY2VDi4m_kpT7GEaerXW1Amb1moRAWpSnSu8t8vdbmerm7luVCY_nKWIo7C5rcVFaZTDKkAD5lqa9WqVmXnrGdXsuRBBYtOYuAHd2ym86vs-WWm5L_02xQIa2s4M7lW8-O-I/s1600/contact.gif" style="position:fixed;float:right;right:10px;top:30px;cursor:pointer; z-index:100;"/></a>
  4. Note replace Your_URL with your contact page url , if you want to change image you can change with your image
  5. Now save widget and enjoy

Google adsense rejected apllication solution to get approved

oogle Adsense application rejected then dont worry i got solution to resolve the page type error you got and relavent solution in a understandable format.So that your Google  adsense application will approve quickly. This solution is purely based on the experience which i gained after applying for Google Adsense I want to give my experience in this tutorial so that your Apllication Approved Quickly.I guess you have gone through my previous post how to increase pageviews for better google rank  using dofollow link, protect your blog from copy(plagiarism). ( Note:google logo right reserves with google.I just using for user understanding.Its just for educational purpose )


blogger tips,tips and tricks,page type issue,tutorial,latest

This tutorial is for who applied and got rejected and for those who going to apply in future.Its irritates when we got Rejected and also lose hope in applying.please be patience there is great saying Price baby wont recognize with out crown .Unless until you present your blog,website in proper manner Adsense wont approve lets see the page type errors and page issues and approach to solve these.

Copyrighted or copy content issue:

This will occur due to usage of copyrighted content,images,copy paste content from other websites .
Solution : Dont remove the backlinks or else desiner credits in your template.If you using any content copy pasted add backlink to that site like source from that sitename.If using images do same and even better upload image on your own rather than linking back to same site.

Insufficient Content error:

This is the most frequent issuse by which every one faces.Although you have 50+ posts still gets this issue.
Solution:The reason behind this is even you have 50+ posts google considers your content as crap because your each post should have more than atleast 300 words.Better provide articles with 500 words around 15 posts and it should be reside for few days i mean the posts should be atleast 10 days old before you apply.

PageNavigation error or Poor navigation:

This what your template reveals about your blog.Means your home page not navigating to all content your page.
Solution: Add archieved pages widget if you are blogger else add all links in one page name it as sitemap like wise.Add page numbers for better navigation see my post how to add pagenumbers plugin widget to blogger.Add menu to your page,Add categories or labels in expanded manner not like dropdown list.

Non Complienece with Google Adsense Terms:

This is improper usage of content keywords,domain selection,mature content in your blog
Solution: remove the keywords else alter them which not suits for google adsense,Add your own privacy policy in your site,avoid free domain which are not fitted with google.

Insufficient traffic :

Solution: Make users stick to your content add random posts you can get how to add random posts here, you should have more pageviews see here how to increase pageviews.

Meta tags error or design error:

This is why because poor design of your site and google faces problem in crawl to your site.
Solution: Make seo optimized site, custom page error pages,proper meta tags using these you can solve this issue

Other changes you should do:

Add contact page you can see my article on how to add blogger official contact page, seo optimized templates for clear navigation, About page,Privacy Policy page, attributes about author page.

Things before you apply for Adsense:

  • Your domain/web site/blog should be 6 months old(for indians).
  • Your blog should resolve issues(if you already applied and rejected)
  • Remove un necessary java/ajax script to reduce page burden
  • You should recieve atleast 100 unique users per day.
Then see the magic your application will approve very quickly, Have a great day.

Free 120 Minutes talktime for airtel aircel vodafone reliance docomo idea bsnl virgn

Hi all i am here to share my latest trick which provides a free of cost recharge which i can say its a free talk time offer which gives you 120min of talk time we can say it as 2hour talk time. this is totally free offer and any network user can get this trick like Airtel,Aircel,Docomo,Vodafone,Reliance,Idea,Simpossible any users what you have to do? what the benifits you can see below how to get this trick.

WHAT YOU NEED:

  1. A mobile phone with active sim having minimum of 2rs balance to give missed call
  2. A small brain

PROCEDURE TO GET FREE TALK TIME:

  1. Just give missed call to 09987666666
  2. Now a return call you will get asking few questions
  3. Answer those questions below are example questions
    1)color of new best ever fair lovely
    Answer- white
    2)why best ever fairlovely is best
    ANSWER- because it give best fairness
    Dont worry they will give options
  4. Now wait for 3 working days to get your free talktime
Note: this offer is officially provided by FAIR AND LOVELY FAIRNESS CREAM

Hope you like my post

pageviews in google increase tricks and tips

Hello there  , here i would like to share trick on how to increase page views in Google tips and tricks, I am really sorry for saying trick as its open secret for all how to get more page views so that indexed in google faster well with this post i will provide some idea for all those who don't have any idea regarding this mean while you may have look on my previous posts blogger css tool tip code , add page number in blogger blog, make your blog seo friendly 


google pageviews increase tips,tips and tricks
I would like to share this valuable trick for those who started blog and waiting for more pageviews.
Following are the ways to increase google rank:
using above tricks you can get your pageviews from google more and more. have a great blogging.

Highly seo optimized fast loading blogger templates free download

Highly seo optimized fast loading blogger templates  for all blogspot users.After getting huge response for my previous post on How to make your blogger template seo optimized using meta tags, here i want to share the preloaded and seo optimized templates for all bloggers offers you best features which every users requires for their blog.You may also like to check this post simple technique to make your template SEO friendly here. let get into our topic seo highly optimized templates.

Here are the seo ready,adsense ready,seo optimized,fast loading,templates which all are free and ready to use templates. I providing the features,demo,download for all templates due to some reasons i can get screenshots for all templates dont mind for that.These templates are collected from internet and sharing here under one roof.All rights regarding templates reserves with template owners so dont remove the footer links leave as intact.

SpiceUp like Blogger Template(Spiceupblog clone template):

  • SEO Ready and seo friendly
  • User friendly and Attractive Design
  • Space for adsense(for posting your adds)
  • Subscription widget In Sidebar
  • Auto read more To make more convenient for users
  • Google rates it 93 out of 100 in  page rank
  • Custom fonts,proffesional,premium look
  • Threaded comments
Spiceup blogger template :  DEMO | DOWNLOAD

Fast Loading Seo Friendly Template:

  • SEO optimized
  • Auto read More with jquery
  • Stylist Menu with jquery
  • Social Network Share Buttons for quick sharing
  • Author Details below every post
  • Stylist  Treaded Comments for elegant look
  • Responsive template-Adjusts template according to screen size.
Fast Seo Friendly template : DEMO| DOWNLOAD

Minimal Seo Loaded template:

  • Ready for SEO 
  • Elegant Stylish look
  • Sharing Social widgets
  • stylish and good looking comments section
  • Auto read more function
  • 3 footer widget for more content
  • Backtotop navigation
  • 2 navigation menus
  • Fast loading
Minimal Seo Loading template : DEMO | DOWNLOAD

One Page Seo Ready Template:

  • Dropdown Menu for easy navigation
  • Space for Adsense
  • Compact And Stylist Threaded Comment
  • Author widget below posts
  • Related Posts more page views
  • Social sharing Buttons.
One page seo Ready template : DEMO | DOWNLOAD

Super Seo Blogger Template:

  • Clean and white template
  • Beautiful comment section
  • Power seo for google rank
  • Navigation bar
  • Social sharing widget
Super seo blogger template : DEMO | DOWNLOAD

Hope you like my article,have a good day.

adsense approval made easy trick 2013 in 2 hours official

Adsense Approval made easy trick is the latest 2013 trick by which even new blogger can get the adsense approved with in 2 hours no need to have extra scripting knowledge else having any seo expertise its very simple and 100% working authorized and legal trick for all newbies ,You can see also my previous topic adsense rejected application solutions make approval easy, custom error pages in blogger to avoid the crawl errors, keyboard effect for all blogger and wordpress users.

adsense,approval,tricks,blogger,get approved in,quick method
First and foremost thing i want to tell all users who applying for adsense this is 100% legal and authorized trick with risk free :

My trick merits:

  • 100% working trick
  • 100% risk free
  • 100% approval from adsense
  • works for all countries even india also
  • Although this is working trick usage of this trick completly depends on the interest of users and i not resposible for any thing regarding my trick (its small note to avoid risk)

 Best method to get approved for adsense( this is not trick):

  1. Maintain good traffic see posts how to increase page views, google pageviews increasing advanced trick
  2. Make your site,blog,portal seo optimized and having error free see my posts how to add meta tags ,make your portal seo friendly and optimized for search enginees
  3. Add additional effects to increase your blog traffic random posts, page numbers for blogger
  4. increase page rank for quick approval
  5. this all know by every user well still i never mind to share this to all users below is the trick which i want to share with you all

 Trick to get approved with in 2 hours( official and authorized trick):

what you need:
  • blog or wesite atleast with 15 posts and 3 months old
  • two(2) gmail accounts one is very new one and other one associated with your blog or portal
  • small brain and little patience
  • small video by your own( not copied video else make slide show using images)
Steps to follow to get quick approval adsense trick:
  1.  Use the fresh newly created gmail
  2. login to youtube.com using the new gmail
  3. now upload video to you tube 
  4. after upload you will find montize tab click that and do the follow instructions
  5. now wait for 2 hours 
  6. After 2 hours you will get mail from adsense rtegarding your approval
  7. Now login to adsense and in home page of your login
  8. Invite the gmail associate with your blog and make as admin
  9. Voila now your adsense get approved very easily
Hope you like my article and enjoyed
comments please

unlimmitted free vodafone gprs only Rs:44


Apps

Some recent posts on iPad apps and resources for developing apps:


I. Reviews of iPad Apps


The Artifacts: a Great Story App for Older Readers (plus Interview with Lynley Stace)

Book Creator for iPad: The Easiest E-book Publishing App You'll Find (And a Bonus Interview with Dan Amos)


The 33 Best Apps for Your New iPad
A Relatively Painless Experience: Checking an Ebook Out from the Library


II. iPad App Resources


1. #Storyappchat: This is a weekly Twitter chat that occurs every Sunday at 9 p.m. E.S.T. People who develop or are interested in picture book apps and ebooks talk about all aspects of the business: developing apps, marketing, and more. Sometimes particular authors or developers are guest hosts. Storyappchat's website provides archives of past chats and its Facebook page continues the conversation during the week. Read my article about #storyappchat.


2. Some app and ebook development tools: 


Demibooks (@demibooks): provides both an authoring software to make interactive book apps (Demibooks Composer) and a online platform to sell them
BookCreator (@redjumperdan): a simple way to create ebooks for the iPad, resulting in a fixed ePub file that can be submitted to Apple's iBookstore (see my interview with Dan Amos)

Interactive Touch Books (@itouchbooks): an online platform to create and sell interactive book apps 

Moglue (@moglue): software that allows one to create and share interactive ebooks for iOS and Adroid devices

UTales (@utales): an ebook and apps publisher that connects readers with a community of authors and illustrators creating picture books

Kwisher (@kwiksher): a Photoshop plugin that allows designers to create comics and interactive books for iOS and Android devices

Best 33 Apps for Your New iPad

You just bought an iPad and you don't want to spend hours researching what apps to get. Here’s my subjective list of 33 great iPad apps to get you started:


Games

If you’re like me, your first downloads will be games. Some of our family favorites:

1. Angry birds ($.99) The birds are angry at the pigs who have stolen their eggs. It is your job to launch them from catapults to destroy the pigs.

2. Cut the Rope ($.99) Figure out how to cut the ropes to feed the hungry candy-loving monster. Each level gets harder and more intricate.  

3. Veggie Samurai ($.99) Take out your aggressions against vegetables by slicing and dicing them with your fingers.

4. Moron Test ($.99) Developed for kids, this is fun & challenging for all. Prove you’re not a moron by following the instructions carefully and quickly. Sometimes you need to think outside the box to advance.


5. Flight Control ($.99) Land planes and avoid crashes. Simple to learn and impossible to put down.

6. Doodle Jump ($.99) Move the iPad back and forth to make the little guy jump higher and higher, landing on pads and avoiding monsters.

7. Osmos ($4.99) Beautiful and absorbing game where you grow bigger by engulfing smaller orbs, set to New Age-y electronic music.


Readers

Your iPad comes with iBooks installed, but you can also turn your iPad into a Kindle, Nook, or Google reader by downloading their free apps.

8. Kindle (free): You probably only need one of the additional reading apps. Kindle is a good one because of Amazon’s huge selection of books.

9. Overdrive (free): Overdrive lets you borrow ebooks from your local public library. I have some issues with it, as described in this post, but it’s hard to complain about free ebooks.


Social networking

Although you can go to the Safari browser to access sites likes Facebook or Twitter, the apps provide a nice interface.

10. Facebook (free): It’s not that innovative, but it’s nice to have a button on the menu page that takes you directly to Facebook.

11. Twitter (free): The Twitter app is more fun to use than the internet version.

12. Flipboard (free): As I wrote in this post, Flipboard is your own custom magazine that includes stories, photos and news from your Facebook and Twitter feeds, and any other social media streams. Flipboard also recommends excellent feeds on all topics (culture, sports, science, news, art, technology, etc). 

Science apps that will wow you

People have figured out some amazing ways to take advantage of the iPad’s interactive and GPS capabilities.

13. Star Walk ($4.99): This interactive astronomy app will make your jaw drop. Hold it up against the night sky and see what stars and constellations you are looking at. Rotate it down to your feet and see the night sky from the other side of the world.

14. Google Earth (free): Use your fingers to navigate anywhere on Earth. Find your house through the high resolution satellite and aerial imagery.

15. The Elements ($13.99): The periodic table of elements was never this beautiful, interactive, informative, or breathtaking.


16. NASA Visualization Explorer (free): NASA presents space and science articles using its stunning imagery (such as video of the swell and subside of plants absorbing carbon).


Educational apps

Some good apps for school age kids:

17. Brain Pop (free): My kids love this app, which provides a free daily short movie that teaches about some topic (a recent one we watched was wind power) and then quizzes them afterwards. A cute robot helps narrate and move things along.

18. Math Bingo ($.99): Practice math facts (addition, subtraction, multiplication and division) at three levels (easy, medium, and hard) while playing Bingo. Win a Bingo Bug every time you beat your own record and play a Brickbreaker-like game with them.

19. Sums Stacker ($.99): This math puzzle makes you think as you manipulate numbers into three stacks to simultaneously solve three addition or subtraction problems. You can view your numbers in innovative ways (spelled out, Roman numerals, in Spanish, on dice, etc).

News/Music/Video/Entertainment

20. Your favorite news site (free, some require subscriptions): Almost every newspaper or magazine has an iPad friendly app. Some require subscriptions (like the New York Times) and others are free (Washington Post, CNN, Slate, NPR, etc). The benefit of having these as apps is having a button that takes you directly to your favorite news source.


21. TED Talks (free): TED talks are short video presentations by innovative thinkers, scientists, artists, comedians, and others. Great food for thought.

22. Pandora (free): Free, personalized radio that lets you set up stations of your favorite artists or genres, introducing you to other similar artists.

23. Netflix (free): access your account and view movies on your iPad


24. NYTimes Crosswords (free intro, subscription to continue): play the daily New York Times crossword puzzle and compete against yourself and others on time. This is my new iPad addiction.


Picture book apps

The best picture book apps add interactive elements that can’t be matched by plain ebooks and involve more than just moving objects around.

25. Cinderella ($7.99) (by Nosy Crow) This is a fun and engaging story app. In each scene, you can click on the characters to get additional dialogue, flip them upside down, and play mini-games (like dressing Cinderella’s sisters, helping clean the kitchen, assembling the  carriage).  

26. Alice ($8.99) Lewis Carroll’s Alice in Wonderland and the iconic illustrations by John Tenniel are gorgeously interactive, in both abridged and full text form. For example, make Alice grow and shrink, watch her fall down the rabbit hole, and throw tarts at the Queen of Hearts.

27. Bartleby’s Book of Buttons, Vol. 1: The Far Away Island ($.99) Young children will love this short story of Bartleby who must collect buttons. Each page is a puzzle and a game in which the reader must figure out the correct sequence of actions to continue.

28. Jack & The Beanstalk ($3.99) Kids will really enjoy the 30 pages of interactive fun. In each page, you need to figure out a game or action that you can take. My kids loved the page where you touch Jack and he belts out a song.

Art Apps (learn about & make art)

29. Art Authority ($9.99) This is a virtual museum of over 55,000 paintings from over 1,000 of the western world’s leading artists, from prehistory to the present. Wander through galleries or search by artist, period, genre, titles, and more.

30. Art Studio ($2.99) An intuitive and easy-to-use professional drawing and painting application that allows up to five layers (see my Illustration Friday post made with this app).

31. Drawing Pad ($1.99) A super kids’ drawing and painting app, with a plethora of tools (paint brushes, crayons, markers, stickers, backgrounds, use of iPhoto pics).

32. Book Creator ($6.99) A great app that lets both kids and professionals create electronic picture books (in fixed layout ePub format) that can be read in iBooks or published in the iBookstore.


And just because it looks great:

33. Weather HD (free) Check out the day’s weather (data from The Weather Underground) in lush, beautiful representative videos.


Which iPad apps are your favorites? I'm always on the lookout for great new ones.